Ground preparation
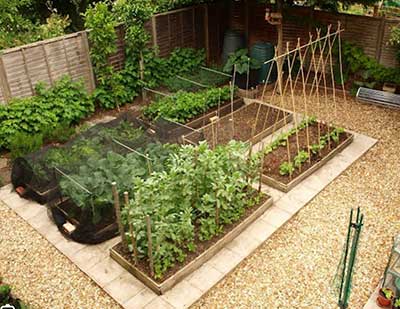
If the plot is in a reasonable condition, making a start should not be too difficult. Firstly, divide the plot into small areas that you feel comfortable with being able to manage in the time you have available. Start by clearing any weeds, then turn the soil over with a fork or spade. This loosens the soil and allows the air and moisture to penetrate the soil.
If the plot is overgrown, the task is still the same. Divide into small areas that you’re comfortable with, then begin to clear the area. If the plot is covered with bramble, you will need a strimmer or hedge clippers to cut them back. When you have cleared the weeds off your plot, you can begin to dig the area over ready for growing crops.
The best time for digging the allotment plot over is during the winter months. This is so the soil has time to break down with the frosts which makes the soil easier to cultivate in the spring.
If the ground is compact or you’re worried about nutrients, it may be worth double digging (the equivalent of 2 spades depth). This will aid with drainage while releasing compact soil. If you’re still concerned about nutrients, consider buying and applying some lime materials or special fertiliser, or doing a Ph test.
Now start sowing your plot. If your plot does not get the sun, choose plants that thrive in the shade. If you’ve cleared before December, cover it with cardboard or plastic sheeting to trap in nutrients.
Composting
Select an area on the plot that you do not want to use for crops (your terms and conditions state that your compost area must be no larger than 5 cubic meters), then build or buy your composter. You can find different styles of containers at your local garden centre or DIY store. Many allotment plot holders use old pallets, which can last for many years.
When composting, it is best to have 2 bins or heaps, one that is being filled and one that is rotting down. If not diseased (for example with potato or tomato blight), you can compost most of the waste from the crops you grow.
You can fill your compost area with many things, including:
- grass cuttings
- vegetable waste
- leaves
- straw
- manure
- annual weeds
- old flowers
Place the material in 15cm (6 inch) layers with a sprinkle of soil between layers. Keep the compost moist as this will help the composting process. As you continue to fill your compost heap, keep it covered with a lid or heavy cover. This will keep in the heat that the compost generates. When your container or heap is full, start on the next heap.
Leave the full area for 3 to 6 months for the material to rot down. You can then use the rotted compost to dig in and improve your soil. You can also use the compost as a mulch to help suppress weeds.
Watering
Water should be used sparingly. Please consider other plot holders when watering your plot. You are not allowed to connect hose pipes to mains water supplies on allotment sites. If you have a shed or greenhouse, you could place a gutter along the side of the roof and save the water in a water butt. This will help to reduce the water use.
When watering your crops this is best done in the evening when the water will soak into the soil. During the day the water will just dry up before penetrating the soil. Too much water will wash any fertilizer or goodness in the soil away. This will make your plants look poor and pale, and affect the crops.
Dos and don’ts of keeping an allotment plot
You should make sure you:
- use the allotment for growing vegetables, flowers, fruit or herbs
- display your allotment plot number clearly
- always lock the site gates
- keep paths clear
- keep paths either side of the plot maintained to a minimum width of 18 inches (450 mm)
- pay your allotment rent within 28 days of receiving an invoice
- always supervise children
- keep dogs on a lead and remove any excrement
- inform the Park Activities Team if you change your address or contact number
You are not allowed to:
- use your allotment for any trade or business.
- sub-let your allotment plot
- build a shed, greenhouse or fence without permission from the Park Activities Team, or without complying with the terms and conditions
- interfere with the water supply to the allotment site
- use a hose pipe or sprinkler to water crops
- dig up paths between allotment plots
- block paths between allotment plots
- light bonfires between April and September
- leave unattended or have smoky bonfires that may cause a nuisance to other allotment holders and surrounding properties
- use carpets on allotment plots
- bring firearms onto allotment sites
- cause a nuisance to other allotment plot holders or surrounding householders by using bad or racist language, playing loud music, harassment, getting drunk or antisocial behaviour
- have barbecues, ovens, gas cylinders, cookers or open fires
- keep livestock without permission from the Parks Activities Team